.svg)


A Terraform string is just a sequence of characters, but almost everything you write in HCL touches one: resource names, tags, file paths, generated policies, connection strings. Knowing how Terraform builds, combines, and templates strings will save you from some of the more confusing errors you'll hit in a growing configuration.
This guide covers how strings are defined, how interpolation and template directives work, the two multiline syntaxes, and where to go for a deeper look at specific built-in functions.
What is a string in Terraform?
Terraform gives you two ways to write a string literal:
- Quoted strings – text wrapped in double quotes, e.g.
"us-east-1" - Heredoc strings – a multiline block bounded by a marker of your choosing, covered below
Quoted strings support a set of backslash escape sequences:
Two additional escapes don't use a backslash at all, and matter once you start interpolating: $${ produces a literal ${ instead of starting an interpolation, and %%{ produces a literal %{ instead of starting a directive. You'll want the first one any time a string needs to contain a literal dollar-brace sequence, for example when generating a shell script that itself uses variable expansion.
String interpolation in Terraform
Interpolation is how you drop a dynamic value into a string using ${ ... }. Terraform evaluates whatever is between the braces and converts it to a string if needed.
The expression inside ${ } can be a variable reference, an attribute reference, a function call, or a simple arithmetic expression:
If you need a literal ${var.name} in your output, rather than an interpolation, escape it with an extra dollar sign: $${var.name}.
env zero note: env zero's Environment Outputs feature borrows this same pattern to reference a value from a different environment: ${env0::}. Add a variable of type Environment Output, point it at another environment's output name, and env zero resolves the value at run time, no manual copy-paste or API calls between environments required. Right now only string-type outputs are supported, which lines up neatly with everything else in this guide, if the value you need is a list or map, you'll need to reference it a different way.Template directives: conditionals and loops inside a string
Interpolation isn't the only template sequence Terraform supports. A %{ ... } sequence is a directive, and it lets you branch or iterate inside a string, something most string-focused guides skip entirely.
The if / else / endif directive chooses between two outputs based on a boolean expression:
The for / endfor directive iterates over a list or map and concatenates the result of a template for each element. This is commonly used inside a heredoc to build a multiline block from a list variable:
The ~ immediately after for and before endfor is a whitespace strip marker. Without it, each directive line leaves behind its own newline and you end up with blank lines between entries. With it, only the newline that belongs to the generated content (the server ... line) survives.
Multiline strings in Terraform
For anything longer than a single line, Terraform uses heredoc syntax: an opening marker (<< or <<-, plus an identifier you choose), the content, and that same identifier alone on its own closing line.
Skip the heredoc for JSON and YAML. It's tempting to hand-write a JSON policy like the one above inside a heredoc, but a single missing comma will fail at apply time with a confusing error. Use jsonencode() or yamlencode() instead, and let Terraform guarantee valid syntax:
Indented heredocs
A standard heredoc treats every space as literal, which forces the closing marker (and every line of content) flush to the left margin, awkward when the block sits inside a nested resource. Add a hyphen, <<-EOT, and Terraform finds the line with the smallest number of leading spaces, then trims that many spaces from every line:
That produces a string with no leading indentation on the first and third lines, and the second line's extra two spaces preserved relative to the others, letting you indent the whole block to match your code without indenting the actual output.
One more difference from quoted strings: backslash characters inside a heredoc are not treated as escape sequences, they're literal. The only two special sequences that still work are $${ and %%{.
Terraform string functions
HCL ships a full library of built-in string functions. Here are the ones you'll reach for most:
FunctionWhat it doesformat()Printf-style templating, e.g. format("%s-%02d", "web", 3)join() / split()Combine a list into a string, or divide a string into a listreplace()Substring find-and-replaceregex() / regexall()Pattern matching and extractionupper() / lower()Case conversiontrim() / trimspace() / trimprefix() / trimsuffix()Strip characters or whitespace from a stringsubstr()Extract part of a string by offset and lengthstartswith() / endswith() / strcontains()Boolean checks on string contentbase64encode() / base64decode()Base64 conversion, common for cloud-init user datatostring()Explicit conversion to string type
A couple of these in practice, building a consistent, lowercase resource name and cleaning up a variable that might carry stray whitespace:
For the full function-by-function reference across every category, not just strings, see env zero's Terraform Functions Guide and Terraform Map Variable guide for the collection-type equivalents like merge() and optional(). And if split() and join() are what brought you here, they get a full treatment, syntax, alternatives, and worked examples, in Terraform Split and Join Functions: Examples and Best Practices.
How to concatenate strings in Terraform
Three ways to combine strings, and when each one fits:
- Interpolation (
${}) – simplest option for combining a small, fixed number of values:"${var.first}-${var.second}" join()– the right choice when you're combining a list of unknown length, e.g. all the subnet IDs in a VPCformat()– best when you need precise control over layout, padding, or multiple substitutions in a fixed template
If you're splitting a delimited string apart specifically so you can loop over the pieces, pair split() with for_each, a common combination for turning one input variable into several resources.
Managing Terraform strings with env zero
Most of what goes wrong with Terraform strings in a team setting isn't the syntax, it's keeping values consistent, secret, and correctly typed across environments. env zero's variable management is built around that:
- String is the default variable type. Plain text is the most common Terraform Variable value type in env zero, and clicking Load Variables From Code pulls your string-type input variables straight from your
.tffiles at their default values. Complex types (lists, maps, objects) are supported too, entered as HCL or JSON. - Sensitive values stay masked. Rather than interpolating a credential or token directly into a string in your configuration, mark the variable as sensitive. Its value is masked in the UI after saving, so secrets don't end up sitting in plain text where anyone with template access can read them.
- Environment Outputs use string interpolation to cross environment boundaries. As noted above,
${env0::}lets one environment consume another's output value, string outputs only, for now. - Watch your quoting when setting variables via
TF_VAR_*. If you're passing a list or map value through an environment variable instead of the UI, env zero needs a properly formatted string, e.g.export TF_VAR_myvar='["a","b"]', and a missingtypefield on the variable is a common cause of format errors. See Handling Common Errors for the full breakdown.
Key points
Terraform strings can be written as quoted literals or heredocs, and both support ${} interpolation for dropping in dynamic values. Heredocs add multiline support, with an indented <<- variant for keeping code readable, and %{} directives add conditionals and loops that most references skip over. Built-in functions cover everything from case conversion to regex extraction, and env zero's variable management extends the same interpolation pattern across environments, without you needing to hardcode a secret to do it.
Frequently Asked Questions
Q. What is a string in Terraform?
A sequence of characters used to represent text, defined either as a quoted literal in double quotes or as a heredoc for multiline content. Both support interpolation.
Q. What's the difference between a quoted string and a heredoc?
Quoted strings are single-line and support backslash escape sequences like \n and \t. Heredocs span multiple lines, don't process backslash escapes, and are better suited to longer blocks like policy documents or config files.
Q. Can I use an if-statement inside a Terraform string?
Yes, using a %{ if } / %{ else } / %{ endif } directive inside a quoted or heredoc string. It's a template directive, distinct from interpolation, and works alongside a %{ for } directive for loops.
Q. How do I stop a heredoc from picking up unwanted indentation?
Use the indented form, <<-EOT instead of <. Terraform trims the smallest common leading whitespace from every line.
Q. Should I build a JSON string with a heredoc?
Generally no. Use jsonencode() (or yamlencode() for YAML) so Terraform validates the structure for you instead of relying on hand-typed brackets and commas.
Q. How do I concatenate strings in Terraform?
Use ${} interpolation for a small fixed number of values, join() for a list of unknown length, or format() when you need precise control over the output layout.
Related Content

Terraform gives you three built-in values for finding your way around the filesystem: path.module, path.root, and path.cwd. They look interchangeable right up until a module gets called from somewhere unexpected, a pipeline runs from a different directory than your laptop does, or someone reaches for the -chdir flag for the first time. Pick the wrong one and a module that worked perfectly on your machine breaks the moment someone else calls it.
This guide covers what each value actually resolves to, where they diverge, and the specific mistakes that break portability the moment a module gets reused, including a couple of gotchas that HashiCorp's own reference docs flag more directly than most third-party writeups do.
What are Terraform path values?
path.module, path.root, and path.cwd belong to a small set of named values Terraform calls filesystem and workspace info. You reference them directly in any expression, the same way you'd reference a resource attribute or an input variable. No function call is required. You just write path.module (or path.root, or path.cwd) wherever you need a directory path.
In most Terraform code, you want path.module. It's the only one of the three considered safe inside a reusable module, because it's the only one anchored to the module's own location rather than to how or where Terraform happens to be invoked.
path.module in practice
Say a child module ships its own template file next to its configuration:
Inside modules/web_tier/main.tf:
No matter where web_tier gets called from (the root module, a nested wrapper module, a completely separate project that vendors it in) path.module still resolves to modules/web_tier, so templatefile() finds nginx.conf.tftpl sitting right next to it. Once you have that path in hand, functions like dirname(), basename(), and fileset() cover most of what you'd want to do with it next.
HashiCorp's own reference docs are more cautious here than most blog coverage: path.module is fine for reads, but avoid it for writes. Consider a module called with for_each:
Inside web_tier, something like this looks safe because each.key differs per instance:
But path.module doesn't vary by instance. Every invocation of a local module shares the same source directory on disk, so every instance in that for_each is writing the exact same file at the exact same time. That's the race condition HashiCorp's docs warn about directly, and it tends not to show up until two or more instances of the module are actually running concurrently. If you need a reminder on how count and for_each behave on module blocks, our Terraform Modules guide covers the basics.
path.root in practice
path.root always points to the directory of the root module, the configuration Terraform was pointed at (or -chdir'd into) for this run, regardless of which module the expression lives in:
This resolves the same way whether the expression sits in the root module or three levels deep in a child module. path.root doesn't move. If you're still deciding what belongs in the root configuration versus a child module in the first place, our Terraform Files and Folder Structure guide covers that layout question directly.
HashiCorp's guidance goes a step further than most coverage of path.root: aside from path.module, they recommend keeping these filesystem and workspace values out of any module meant to be called by someone else, and reserving them for the root module only. The same caution applies to terraform.workspace. A shared module that bakes in an assumption about its caller's root directory, or its workspace name, stops being portable the same way a hardcoded absolute path would:
The fix is the same one you'd reach for with any hardcoded value in a shared module: turn it into an input variable and let the calling configuration decide, rather than letting the module infer it from context that changes depending on who's calling it.
path.cwd and the -chdir flag
path.cwd is the one value of the three that has nothing to do with your configuration's structure. It's simply the directory your shell was in when you ran the terraform command, captured before any -chdir argument is applied:
Given outputs like these inside environments/prod:
path.root resolves to /home/dev/repo/environments/prod, following -chdir the way path.module would too. path.cwd still resolves to /home/dev/repo, the directory you were actually standing in when you typed the command.
That gap is exactly why HashiCorp recommends avoiding path.cwd where path.root or path.module would do the job. path.cwd encodes where the terminal happened to be, which a CI runner, a teammate's machine, or a wrapper script one directory removed from yours won't reproduce. If a resource argument depends on it, moving the invocation changes that value even though nothing in the actual configuration changed, and Terraform reads that as a diff, not a no-op.
Does OpenTofu handle these the same way?
Yes. OpenTofu's own reference documentation defines path.module, path.root, and path.cwd in nearly identical language to Terraform's, down to the same recommendation to prefer path.root or path.module over path.cwd. If you're running a mixed Terraform and OpenTofu estate, or migrating between the two, path values aren't something you need to re-verify per binary. The behavior didn't diverge when OpenTofu forked.
Managing Terraform paths with env zero
Two mechanics in env zero make these path values worth getting right rather than something you patch around after a deployment fails.
- The Working Directory field sets your effective root module. If your Terraform configuration lives in a subdirectory of the repository, you point env zero at it from the Working Directory field under a template's Advanced settings. That subdirectory becomes the root module for the deployment, so
path.root(and anypath.modulereference at that top level) resolves relative to it, not to the repository root. A module that assumespath.rootmeans "the repo root" rather than "wherever this deployment's working directory points" runs into that assumption the first time the field gets set or changed. - Remote runners don't persist a working copy between deployments. env zero's Ad Hoc Tasks pull a fresh git clone for each run, and standard deployments work the same way. Terraform code that leans on
path.cwdto reach something outside the checked-out configuration, an absolute path baked in during a prior local run, a file a teammate left in a directory above the repo, has nothing to find once that clone starts fresh.path.moduleandpath.rootboth resolve from what's actually inside the checkout, which is one more reason they're the values worth defaulting to.
Best practices when using Terraform path values
- Default to
path.moduleinside anything meant to be called more than once. - Reserve
path.rootfor genuinely root-level concerns (shared config, an environments/ folder) and keep it out of modules meant for reuse. - Treat
path.cwdas an escape hatch, not a default. If you're reaching for it, check whetherpath.rootwould do the same job more portably first. - Avoid writing files into
path.moduleorpath.rootfrom provisioners without a clear ownership story. Multiple instances of the same module can share the exact samepath.module. - If a shared module needs a unique name or prefix, take it as an input variable. Don't derive it from
terraform.workspaceorpath.rootinside the module itself. - Test path-dependent code from more than one working directory, and with
-chdirif you use it, before calling it done. A single successful local run doesn't confirm portability.
Frequently asked questions
Q. What's the difference between path.module, path.root, and path.cwd?
path.module is the directory of the module where the expression is written, and it changes depending on which module you're in. path.root is the directory of the root module for the whole configuration, and it stays the same no matter which module references it. path.cwd is the directory you were in when you ran the terraform command, before any -chdir flag, and it has nothing to do with your configuration's structure at all.
Q. Is path.module an absolute path or a relative path?
Absolute. All three path values, path.module, path.root, and path.cwd, resolve to absolute filesystem paths.
Q. Does path.root change inside a child module?
No. path.root always points to the root module's directory, even when it's referenced from several levels deep inside a child module.
Q. Do OpenTofu and Terraform handle path.module, path.root, and path.cwd the same way?
Yes. OpenTofu's reference documentation defines all three with the same behavior and the same guidance to prefer path.root or path.module over path.cwd. This is not something that diverged when OpenTofu forked from Terraform.
Q. Does path.module change across instances of a for_each or count module call?
No, and this is a common source of surprise. Multiple instances of the same local module call share the same source directory, so they share the same path.module value. That's fine for reads, but HashiCorp's own docs specifically warn against writing to it in that situation, since concurrent instances can end up racing to write the same path at the same time.
Q. Why is path.cwd considered risky in CI/CD or remote runs?
Because it depends on the directory you happened to invoke Terraform from, not on your configuration's structure. A CI runner, a teammate's machine, or an orchestration platform that re-clones your repository for every run can each have a different working directory than your laptop does, which makes anything derived from path.cwd unreliable outside one consistent environment.
Key points
path.module, path.root, and path.cwd solve the same underlying problem, finding a file reliably regardless of how or where Terraform runs, but only two of them are safe defaults. path.module keeps a module's own files self-contained and portable. path.root is the right choice for genuinely root-level concerns, kept out of shared modules. path.cwd is worth reaching for only when you specifically mean the invocation directory, and even then it's worth testing from more than one working directory before you trust it.
Terraform Path Values: path.module, path.root, and path.cwd Explained


Terraform gives you two ways to express the same infrastructure. You can declare resources directly, or you can wrap them in a module and call that module with inputs. Both produce identical cloud objects. The choice is not about capability, it is about where you want the complexity to live and who you want to be responsible for it.
Most teams get this decision wrong in one of two directions. Some modularize on day one and end up with a registry full of thin wrappers that add a layer of indirection and little else. Others never modularize at all, and end up with the same forty lines of bucket configuration copy-pasted across nine environments, each quietly diverging from the others in ways nobody has time to reconcile.
This guide covers the distinction that actually matters in practice, the signals that tell you a pattern is ready to be promoted into a module, and the mechanics of promoting it without Terraform tearing down your infrastructure on the way. For module anatomy, input and output design, and composition patterns, see our Terraform modules guide, which this article treats as background rather than repeating.
Disclaimer
Everything discussed here works the same way in OpenTofu, the open-source Terraform alternative. To keep things familiar for DevOps engineers, we use Terraform terminology as a catch-all throughout.
The distinction that actually matters
The textbook answer is that a resource represents one object managed by a provider, while a module is a container for multiple resources that can be reused. That is correct, and it is also not the part that will cost you a weekend.
A resource is a unit of change
A resource block maps to a single provider-managed object and carries a single address in state. When you declare an S3 bucket at the root of your configuration, Terraform tracks it as aws_s3_bucket.logs. Every plan compares that address against the real world and proposes the smallest reconciliation it can.
resource "aws_s3_bucket" "logs" {
  bucket = "acme-prod-access-logs"
}

resource "aws_s3_bucket_versioning" "logs" {
  bucket = aws_s3_bucket.logs.id

  versioning_configuration {
    status = "Enabled"
  }
}

# State address: aws_s3_bucket.logs
Resources are maximally explicit. Everything the provider supports is available to you at the call site, the plan output names attributes you recognize, and debugging means reading one file.
A module is a unit of interface
A module is a boundary. It takes inputs, produces outputs, and hides whatever happens in between. The moment you wrap that same bucket in a module, its state address changes to module.logging.aws_s3_bucket.this. The cloud object is unchanged. The identity Terraform uses to track it is not.
module "logging" {
  source = "./modules/log-bucket"

  name       = "acme-prod-access-logs"
  versioning = true
}

# State address: module.logging.aws_s3_bucket.this
That address change is the single most important mechanical fact in this article. It is why moving resources into modules is dangerous by default, and it is covered in detail further down.
The tradeoff, stated honestly
A resource gives you control and visibility. A module gives you a contract. A contract is worth having when several callers need the same guarantees, and it is pure overhead when there is only one caller and the guarantees are still being invented.
- Resources optimize for clarity now. You can see everything, change anything, and nothing breaks for anyone else.
- Modules optimize for consistency later. You change one interface and every consumer inherits the change, which is exactly as powerful and as dangerous as it sounds.
Start with resources, then promote deliberately
The default that holds up across most teams is to write resources first and promote to a module once the pattern has proven itself. Both halves of that sentence carry weight, because promoting at the wrong time is expensive in both directions.
What promoting too early costs
The most common failure is the wrapper module: a module that contains one resource and exists mainly because someone decided modules were good practice. It passes a dozen variables straight through to the provider and adds nothing but a layer.
# modules/bucket/main.tf
# An anti-pattern: this module makes no decisions of its own.

variable "bucket" {
  type = string
}

variable "tags" {
  type    = map(string)
  default = {}
}

resource "aws_s3_bucket" "this" {
  bucket = var.bucket
  tags   = var.tags
}

output "id" {
  value = aws_s3_bucket.this.id
}

output "arn" {
  value = aws_s3_bucket.this.arn
}

# The caller gains nothing and loses direct access to every
# other argument the aws_s3_bucket resource supports.
This pattern taxes you every time you touch it:
- Every new provider argument a caller needs becomes a change to the module, a version bump, and an upgrade for every consumer. The provider already supported it. Your abstraction did not.
- The module's
variables.tfslowly becomes a worse-documented, always-stale copy of the provider schema. - Debugging requires reading two files instead of one, and the plan output now references addresses that do not match the code a newcomer is looking at.
- You have created a versioning obligation and an owner without buying any consistency, because there is only one caller.
A module earns its indirection by encoding decisions, not by forwarding arguments. If you cannot name a decision the module makes on the caller's behalf, such as a naming convention, an encryption default, a required tag set, or a hardened policy attachment, it is not ready to be a module.
What promoting too late costs
The opposite failure is quieter and more expensive. Copy-pasted resource blocks do not stay identical. One environment gets versioning enabled during an audit, another gets a lifecycle rule during a cost review, a third gets neither because the person doing the work was on call that week.
Six months later nobody can answer which copy is correct, and a single security change has to be applied by hand in nine places, each of which needs its own review and its own plan. This is also the point at which a well-intentioned bulk find-and-replace becomes the most dangerous change in the repository.
Five signals a pattern is ready to become a module
Rather than a feeling, use signals you can point at in a pull request.
1. You are writing the third copy
The rule of three travels well from software engineering. The first instance teaches you the requirement. The second reveals which parts vary. The third is where copy-paste stops being pragmatic and starts being debt, because you now have enough information to know what the interface should be.
2. The input surface has stopped moving
If the set of things that vary between instances changed in the last two weeks, the abstraction is not ready. Modules are expensive to reshape once consumers depend on them, since every interface change becomes a coordinated upgrade. Wait for the variables to settle before you freeze them into a contract.
3. The same review comments keep recurring
When reviewers repeatedly ask about the same naming, tagging, or encryption decisions, those decisions belong in code rather than in review. That is precisely the work a module does well: it makes the correct choice the default and the incorrect choice something you have to opt into visibly.
4. A control has to apply to every instance
Compliance and security requirements are inherently cross-instance. If every bucket in the estate must have encryption, access logging, and public access blocked, a module lets you implement that once and roll it out through a version bump rather than a nine-branch campaign. Note the caveat in the governance section below: a module makes the control available, not mandatory.
5. Consumers will outnumber authors
Modules pay off when the people calling them are not the people maintaining them. If an application team needs to provision a queue without learning your provider's argument surface, the module is the product. If you are the only caller and the only author, you are talking to yourself through an interface.
Signals to wait
- The requirement is still being discovered, and the shape of the configuration changed this week.
- There is one caller and no credible second one on the roadmap.
- The variation between instances is larger than the shared part, which usually means you have found two patterns rather than one.
- Covering the variation would take a dozen or more inputs. A module with a very wide input surface is usually an abstraction drawn in the wrong place.
How to promote resources into a module without destroying them
Here is the part that catches people. When you move a resource into a module, its state address changes. Terraform's default reading of a changed address is that the old object should be destroyed and a new one created. For a stateless resource that is an inconvenience. For a database, an object store, or anything holding data, it is an incident.
A plan against a naive refactor will tell you exactly this, and it is worth learning to recognize the shape of it before you see it under pressure:
$ terraform plan
Plan: 1 to add, 0 to change, 1 to destroy.
One to add and one to destroy, for a refactor where you changed no arguments, means Terraform has lost track of the object's identity. Do not apply that plan.
Declare the move with a moved block
Since Terraform v1.1, the moved block lets you record the address change in configuration so Terraform treats it as a rename rather than a replacement. HashiCorp documents this as the supported way to refactor module addresses, and it is plannable, which means you can see the outcome before committing to it.
# The resource blocks have moved into ./modules/log-bucket.
# Declare the address change so Terraform renames instead of replaces.

moved {
  from = aws_s3_bucket.logs
  to   = module.logging.aws_s3_bucket.this
}

moved {
  from = aws_s3_bucket_versioning.logs
  to   = module.logging.aws_s3_bucket_versioning.this
}
Before planning the new address, Terraform checks state for an existing object at the from address, renames it to the to address, and then plans as if the object had always lived there. The correct plan for a pure promotion is unambiguous:
$ terraform plan
Plan: 0 to add, 0 to change, 0 to destroy.
Zero on all three counts is the gate. If you see anything else after adding your moved blocks, an address is wrong, and the fix is in the block rather than in the state.
Moving many resources and changing keys at the same time
Promotion rarely involves one resource. You will usually be moving a handful of related resources into a module at once, and often switching from individual instances to count or for_each in the same change. The moved block handles both: when either address includes an instance key, Terraform treats the addresses as referring to specific instances, so you can move between keyed and unkeyed forms in the same refactor.
# Promoting three hand-written environments into one for_each module call.

moved {
  from = aws_s3_bucket.logs_dev
  to   = module.logging["dev"].aws_s3_bucket.this
}

moved {
  from = aws_s3_bucket.logs_staging
  to   = module.logging["staging"].aws_s3_bucket.this
}

moved {
  from = aws_s3_bucket.logs_prod
  to   = module.logging["prod"].aws_s3_bucket.this
}

# Adopting for_each on an existing count-based resource works the
# same way: count index to map key.
moved {
  from = aws_subnet.private[0]
  to   = aws_subnet.private["eu-west-1a"]
}
If you are new to iterating over collections, our guide to terraform for_each covers the collection types and gotchas in depth.
When the move crosses a state boundary
Moved blocks work within a single state file. If your promotion also splits configuration across state files, such as pulling a shared networking layer out into its own workspace, you need a different tool. HashiCorp recommends removing the resource from the source state and importing it into the target state, using the configuration-driven removed block, added in Terraform v1.7, together with the import block from v1.5. Both are plannable and both leave a record in configuration history, which terraform state mv does not.
# In the SOURCE configuration: forget the object, do not delete it.
removed {
  from = aws_vpc.shared

  lifecycle {
    destroy = false
  }
}

# In the TARGET configuration: adopt the existing object.
import {
  to = module.network.aws_vpc.this
  id = "vpc-0a1b2c3d4e5f"
}

# Omitting the lifecycle block destroys the real resource.
# Plan first, and read the plan.
The lifecycle block is doing the load-bearing work in the removed example. Setting destroy to false is what tells Terraform to forget the object rather than delete it. Getting that wrong deletes production. Our guide to the import command and import block covers the import side in detail, and the Terraform state file guide covers the underlying state operations.
How long to keep the moved blocks
For a configuration you alone own, you can remove moved blocks once the change is applied everywhere. For a shared module, keep them. HashiCorp's guidance is that removing them is only safe when you are certain every consumer has run an apply against the new version, and in a large organization that certainty is difficult to obtain and easy to assume incorrectly. The blocks are cheap to keep and they double as a changelog of the module's structural history.
Operating the module once it exists
Promotion is the beginning of the obligation, not the end of it. A module with consumers is a product with users.
Iterate over the module, not the copies
The payoff for the interface is that scale becomes a data problem rather than a code problem. Since Terraform 0.13, for_each and count work on module blocks, so twelve near-identical environments become one module call driven by a map.
locals {
  log_buckets = {
    dev     = { versioning = false, retention_days = 7 }
    staging = { versioning = false, retention_days = 30 }
    prod    = { versioning = true, retention_days = 365 }
  }
}

module "logging" {
  source   = "./modules/log-bucket"
  for_each = local.log_buckets

  name           = "acme-${each.key}-access-logs"
  versioning     = each.value.versioning
  retention_days = each.value.retention_days
}
Version the interface
An unversioned module is a shared mutable variable across every environment you own. Pin module sources to a version constraint so a change to the module does not retroactively change infrastructure that nobody deployed. Registry-sourced modules support the version argument, and our Terraform Registry guide covers publishing, semantic versioning, and constraint syntax.
module "logging" {
  # Registry source with a pinned version constraint.
  source  = "app.env0.com/acme/log-bucket/aws"
  version = "~> 2.4"

  name       = "acme-prod-access-logs"
  versioning = true
}

# "~> 2.4" accepts 2.4.x and 2.5.x but never 3.0.0, so a breaking
# interface change cannot arrive unannounced.
Test module changes before consumers inherit them
Once a module has consumers, an untested change is a change to every one of them at once. Terraform's native test framework, generally available since v1.6, lets you write tests in HCL in .tftest.hcl files, with each run block executing a plan or apply and asserting against the result. Terraform v1.7 added provider mocking, which makes it practical to unit-test a module without creating real infrastructure or holding cloud credentials.
# tests/defaults.tftest.hcl

mock_provider "aws" {}

variables {
  name = "test-bucket"
}

run "versioning_defaults_off" {
  command = plan

  assert {
    condition     = aws_s3_bucket_versioning.this.versioning_configuration[0].status == "Suspended"
    error_message = "Versioning must default to off for non-production callers."
  }
}

run "encryption_is_not_optional" {
  command = plan

  assert {
    condition     = aws_s3_bucket_server_side_encryption_configuration.this != null
    error_message = "Module must always attach server-side encryption."
  }
}
$ terraform test
tests/defaults.tftest.hcl... pass
Success! 4 passed, 0 failed.
For how the native framework compares to the Go-based alternative, see our Terratest vs. Terraform/OpenTofu test comparison.
Where modules stop being governance
Module discussions often end with the claim that modules give you governance, because standards are encoded once and reused everywhere. That is half true, and the missing half matters more than the present one.
A module is a convention. It is opt-in. Nothing in Terraform prevents an engineer from skipping your hardened bucket module and writing a raw resource block with public access enabled, and nothing in Terraform prevents that configuration from applying cleanly. Your module encoded the standard. It did not enforce it.
Enforcement requires something that evaluates the plan regardless of how the configuration was written. That is the job of policy-as-code:
- A module makes the compliant path the easy one.
- A policy makes the non-compliant path impossible, or at least impossible without a recorded human approval.
Those are complementary layers, not substitutes, and teams that ship only the first one tend to discover the gap during an audit. Our guides to using Open Policy Agent with Terraform and how policy-as-code enhances infrastructure governance cover the enforcement layer.
There is a third gap that neither modules nor policies close on their own: resources that exist in your cloud accounts but appear in no configuration at all. A module cannot standardize something it has never seen, and a plan-time policy never evaluates a resource created by hand in a console. Closing that loop requires comparing what is actually deployed against what your IaC claims to manage.
Managing the resource-to-module lifecycle with env zero
The decisions above are Terraform decisions and they hold regardless of what you run Terraform on. The operational half, distributing modules, gating changes, and knowing what is outside the model, is a platform problem.
Distribute modules through a private registry
env zero includes a private module registry so internal modules get the same versioning, discovery, and documentation surface as public ones without leaving your organization. Module versions map to Git tags following semantic versioning, the readme renders from the repository, and each module page includes a prefilled source snippet for callers. Multiple modules can live in one repository using folder-based module paths.
Gate module changes with continuous testing
The registry can run your tests for you. With module continuous integration testing enabled, env zero executes the tftest files in your module directory on every commit to the default branch, and optionally on every pull request targeting it. Infrastructure is created, tested, and destroyed in a single flow, results and run history are retained, and status checks surface in your VCS so a failing module change is visible in review rather than after release.
Enforce the standard the module encodes
Because a module cannot compel its own use, env zero evaluates the plan itself. Policies let you apply OPA rules to deployments regardless of how the configuration was authored, and approval policies require a recorded human decision on changes that cross a threshold you define. This is the layer that turns a convention into a control.
Give consumers a path that does not require authoring HCL
Templates expose a curated module as a self-service option, so an application team provisions from an approved pattern with the variables you decided to expose. That is the point at which the module stops being an internal convenience and becomes the interface between the platform team and everyone else.
Find the resources no module ever touched
Cloud Compass audits IaC coverage across your cloud accounts and surfaces resources that exist but are unmanaged, which is the population your modules and your policies are both blind to. Codifying those into configuration is what makes the standard you encoded actually universal rather than merely available.
Final thoughts
Resources and modules are not competing approaches to be chosen once. They are two points in a lifecycle. New and uncertain work belongs in resources, where it is explicit and cheap to change. Proven and repeated work belongs in modules, where it is consistent and cheap to roll out. The skill is recognizing the transition and executing it without collateral damage.
Concretely: write resources until the third copy, promote when the input surface stops moving, use moved blocks and insist on a plan showing zero destroys, version the interface, test before consumers inherit changes, and remember that the module is the convention while policy is the control.
For structuring the repositories all of this lives in, see our Terraform repository strategies and structures guide, and for module ownership across multiple teams, our guide to scaling ownership and platform layer design.
Frequently asked questions
Q. What is the difference between a Terraform module and a resource?
A resource is a single object managed by a provider and the smallest unit of change Terraform tracks. A module is a container that groups configuration behind an interface of inputs and outputs so it can be reused. The practical difference is state identity: the same bucket declared at the root has the address aws_s3_bucket.logs, and inside a module it becomes module.logging.aws_s3_bucket.this.
Q. Should I create a Terraform module for a single resource?
Usually not. A module wrapping one resource and forwarding arguments to the provider adds indirection, a versioning obligation, and an upgrade path for consumers without buying consistency. A module earns its place by encoding decisions such as naming conventions, encryption defaults, or required tags, not by passing variables through.
Q. How do I move resources into a Terraform module without destroying them?
Use a moved block, available since Terraform v1.1, to declare the old and new addresses so Terraform treats the change as a rename rather than a replacement. Then run a plan and confirm it reports zero to add, zero to change, and zero to destroy before applying. If the move also crosses into a different state file, use removed and import blocks instead.
Q. Can I use for_each on a Terraform module block?
Yes. Since Terraform 0.13, both for_each and count work on module blocks, which is how you turn many near-identical environments into a single module call driven by a map. Moved blocks also support switching between keyed and unkeyed addresses, so you can adopt for_each during a refactor without recreating resources.
Q. Do Terraform modules enforce infrastructure standards?
No. Modules make a standard available and convenient, but using them is optional and nothing stops an engineer from writing a raw resource block that bypasses the module entirely. Enforcement requires policy-as-code that evaluates the plan regardless of how the configuration was written, with approval gates on sensitive changes.
Related: our Terraform modules guide covers module anatomy and composition, and env0’s Terraform integration brings module distribution, policy enforcement, and deployment guardrails to the workflow.
Terraform Modules vs. Resources: When to Promote a Pattern
A Terraform string is just a sequence of characters, but almost everything you write in HCL touches one: resource names, tags, file paths, generated policies, connection strings. Knowing how Terraform builds, combines, and templates strings will save you from some of the more confusing errors you'll hit in a growing configuration.
This guide covers how strings are defined, how interpolation and template directives work, the two multiline syntaxes, and where to go for a deeper look at specific built-in functions.
What is a string in Terraform?
Terraform gives you two ways to write a string literal:
- Quoted strings – text wrapped in double quotes, e.g.
"us-east-1" - Heredoc strings – a multiline block bounded by a marker of your choosing, covered below
Quoted strings support a set of backslash escape sequences:
Two additional escapes don't use a backslash at all, and matter once you start interpolating: $${ produces a literal ${ instead of starting an interpolation, and %%{ produces a literal %{ instead of starting a directive. You'll want the first one any time a string needs to contain a literal dollar-brace sequence, for example when generating a shell script that itself uses variable expansion.
String interpolation in Terraform
Interpolation is how you drop a dynamic value into a string using ${ ... }. Terraform evaluates whatever is between the braces and converts it to a string if needed.
The expression inside ${ } can be a variable reference, an attribute reference, a function call, or a simple arithmetic expression:
If you need a literal ${var.name} in your output, rather than an interpolation, escape it with an extra dollar sign: $${var.name}.
env zero note: env zero's Environment Outputs feature borrows this same pattern to reference a value from a different environment: ${env0::}. Add a variable of type Environment Output, point it at another environment's output name, and env zero resolves the value at run time, no manual copy-paste or API calls between environments required. Right now only string-type outputs are supported, which lines up neatly with everything else in this guide, if the value you need is a list or map, you'll need to reference it a different way.Template directives: conditionals and loops inside a string
Interpolation isn't the only template sequence Terraform supports. A %{ ... } sequence is a directive, and it lets you branch or iterate inside a string, something most string-focused guides skip entirely.
The if / else / endif directive chooses between two outputs based on a boolean expression:
The for / endfor directive iterates over a list or map and concatenates the result of a template for each element. This is commonly used inside a heredoc to build a multiline block from a list variable:
The ~ immediately after for and before endfor is a whitespace strip marker. Without it, each directive line leaves behind its own newline and you end up with blank lines between entries. With it, only the newline that belongs to the generated content (the server ... line) survives.
Multiline strings in Terraform
For anything longer than a single line, Terraform uses heredoc syntax: an opening marker (<< or <<-, plus an identifier you choose), the content, and that same identifier alone on its own closing line.
Skip the heredoc for JSON and YAML. It's tempting to hand-write a JSON policy like the one above inside a heredoc, but a single missing comma will fail at apply time with a confusing error. Use jsonencode() or yamlencode() instead, and let Terraform guarantee valid syntax:
Indented heredocs
A standard heredoc treats every space as literal, which forces the closing marker (and every line of content) flush to the left margin, awkward when the block sits inside a nested resource. Add a hyphen, <<-EOT, and Terraform finds the line with the smallest number of leading spaces, then trims that many spaces from every line:
That produces a string with no leading indentation on the first and third lines, and the second line's extra two spaces preserved relative to the others, letting you indent the whole block to match your code without indenting the actual output.
One more difference from quoted strings: backslash characters inside a heredoc are not treated as escape sequences, they're literal. The only two special sequences that still work are $${ and %%{.
Terraform string functions
HCL ships a full library of built-in string functions. Here are the ones you'll reach for most:
FunctionWhat it doesformat()Printf-style templating, e.g. format("%s-%02d", "web", 3)join() / split()Combine a list into a string, or divide a string into a listreplace()Substring find-and-replaceregex() / regexall()Pattern matching and extractionupper() / lower()Case conversiontrim() / trimspace() / trimprefix() / trimsuffix()Strip characters or whitespace from a stringsubstr()Extract part of a string by offset and lengthstartswith() / endswith() / strcontains()Boolean checks on string contentbase64encode() / base64decode()Base64 conversion, common for cloud-init user datatostring()Explicit conversion to string type
A couple of these in practice, building a consistent, lowercase resource name and cleaning up a variable that might carry stray whitespace:
For the full function-by-function reference across every category, not just strings, see env zero's Terraform Functions Guide and Terraform Map Variable guide for the collection-type equivalents like merge() and optional(). And if split() and join() are what brought you here, they get a full treatment, syntax, alternatives, and worked examples, in Terraform Split and Join Functions: Examples and Best Practices.
How to concatenate strings in Terraform
Three ways to combine strings, and when each one fits:
- Interpolation (
${}) – simplest option for combining a small, fixed number of values:"${var.first}-${var.second}" join()– the right choice when you're combining a list of unknown length, e.g. all the subnet IDs in a VPCformat()– best when you need precise control over layout, padding, or multiple substitutions in a fixed template
If you're splitting a delimited string apart specifically so you can loop over the pieces, pair split() with for_each, a common combination for turning one input variable into several resources.
Managing Terraform strings with env zero
Most of what goes wrong with Terraform strings in a team setting isn't the syntax, it's keeping values consistent, secret, and correctly typed across environments. env zero's variable management is built around that:
- String is the default variable type. Plain text is the most common Terraform Variable value type in env zero, and clicking Load Variables From Code pulls your string-type input variables straight from your
.tffiles at their default values. Complex types (lists, maps, objects) are supported too, entered as HCL or JSON. - Sensitive values stay masked. Rather than interpolating a credential or token directly into a string in your configuration, mark the variable as sensitive. Its value is masked in the UI after saving, so secrets don't end up sitting in plain text where anyone with template access can read them.
- Environment Outputs use string interpolation to cross environment boundaries. As noted above,
${env0::}lets one environment consume another's output value, string outputs only, for now. - Watch your quoting when setting variables via
TF_VAR_*. If you're passing a list or map value through an environment variable instead of the UI, env zero needs a properly formatted string, e.g.export TF_VAR_myvar='["a","b"]', and a missingtypefield on the variable is a common cause of format errors. See Handling Common Errors for the full breakdown.
Key points
Terraform strings can be written as quoted literals or heredocs, and both support ${} interpolation for dropping in dynamic values. Heredocs add multiline support, with an indented <<- variant for keeping code readable, and %{} directives add conditionals and loops that most references skip over. Built-in functions cover everything from case conversion to regex extraction, and env zero's variable management extends the same interpolation pattern across environments, without you needing to hardcode a secret to do it.
Frequently Asked Questions
Q. What is a string in Terraform?
A sequence of characters used to represent text, defined either as a quoted literal in double quotes or as a heredoc for multiline content. Both support interpolation.
Q. What's the difference between a quoted string and a heredoc?
Quoted strings are single-line and support backslash escape sequences like \n and \t. Heredocs span multiple lines, don't process backslash escapes, and are better suited to longer blocks like policy documents or config files.
Q. Can I use an if-statement inside a Terraform string?
Yes, using a %{ if } / %{ else } / %{ endif } directive inside a quoted or heredoc string. It's a template directive, distinct from interpolation, and works alongside a %{ for } directive for loops.
Q. How do I stop a heredoc from picking up unwanted indentation?
Use the indented form, <<-EOT instead of <. Terraform trims the smallest common leading whitespace from every line.
Q. Should I build a JSON string with a heredoc?
Generally no. Use jsonencode() (or yamlencode() for YAML) so Terraform validates the structure for you instead of relying on hand-typed brackets and commas.
Q. How do I concatenate strings in Terraform?
Use ${} interpolation for a small fixed number of values, join() for a list of unknown length, or format() when you need precise control over the output layout.
Terraform Strings: Interpolation, Heredoc & Built-In Functions

You run [.code]terraform apply[.code], it fails partway through, and the next command you run refuses to move: [.code]Error acquiring the state lock[.code]. Nothing is broken yet, but nothing will proceed either until the lock is cleared.
This guide covers what [.code]force-unlock[.code] actually does, when it is safe to use, how to find the lock ID on every major backend, and what to do if the command itself does not fix things.
What does terraform force-unlock do?
Terraform locks state before any operation that could write to it. The lock stops two processes from writing to the same state file at once, which is the most common way a state file gets corrupted. Locking happens automatically and silently on every plan and apply where the backend supports it. You will not see a message unless acquiring the lock takes longer than expected.
[.code]force-unlock[.code] is the manual override for when that automatic process gets stuck. It removes the lock record so a new operation can proceed. According to HashiCorp, the command does not modify your infrastructure, and on most backends it does not touch your state data either. It just clears the record that says the state is currently held.
Usage:
The only option is [.code]-force[.code], which skips the yes or no confirmation prompt. That is useful inside a script or CI job where nothing is available to type “yes” into. Otherwise leave it off, since the confirmation step is the last chance to catch a mistake before you unlock something someone else is actively using.
The lock ID is not optional and is not guessable. Terraform prints it in the error message when a lock is already held, and [.code]force-unlock[.code] requires an exact match. Per HashiCorp's own documentation, the ID works as a nonce, a one-time verification token that ensures a lock and an unlock target the same lock. That is deliberate: you can only release a lock you can identify, not just any lock on the state file.
One thing worth flagging up front: on the local backend, a stuck lock can only be cleared by the same machine and user that created it. There is no separate process to force it from elsewhere, which is one more reason most teams move to a remote backend, such as the ones covered in this backend configuration guide, before this becomes a live problem.
When should you use the force-unlock command?
Treat [.code]force-unlock[.code] as a last resort, not a first response. If two operations are genuinely running against the same state at the same time, forcing a lock open defeats the entire purpose of state locking and can leave you with a corrupted state file. Only run it when you are certain the process that created the lock is no longer active.
A stuck lock usually traces back to one of a few causes:
- A [.code]terraform apply[.code] or [.code]plan[.code] was cancelled or errored mid-run, for example because a CI job timed out or someone hit Ctrl+C, so Terraform never reached the step where it releases the lock.
- The machine or build agent running Terraform lost its network connection to the backend before the lock could be released.
- The backend storage itself changed mid-operation, for example a Terraform run modifying firewall rules, private endpoints, or access policies on the very storage account that holds the state file.
If none of those match your situation and you are not sure why the lock exists, treat that as a reason to investigate before clearing it, not a reason to assume it is safe to force.
Where to find the lock ID for every backend
In most cases you will not need to go looking. The lock ID appears directly in the [.code]Error acquiring the state lock[.code] message, under the [.code]ID:[.code] field, alongside who holds it and when it was created. The backend-specific detail below matters mainly when you are troubleshooting secondhand, for example clearing a lock a teammate reported without a fresh error message in front of you.
Local backend
Terraform writes a [.code].terraform.tfstate.lock.info[.code] file next to the state file while an operation is in progress. It is a small JSON object containing the lock [.code]ID[.code], the operation type, and who created it. On clean exit, Terraform deletes this file automatically. As noted above, a lock created by one machine cannot be released by [.code]force-unlock[.code] from a different one.
Amazon S3
As of Terraform 1.11, the S3 backend supports native state locking through the [.code]use_lockfile[.code] argument, and no longer requires a separate DynamoDB table. Setting it to [.code]true[.code] tells Terraform to create a lock object in the same S3 bucket as your state, using conditional writes so only one process can create it at a time.
With native locking, the lock ID is whatever the error message reports; there is no separate table to query. If your configuration still uses the older [.code]dynamodb_table[.code] argument, note that HashiCorp has deprecated it in favor of [.code]use_lockfile[.code]. On that legacy path, the lock lives as an item in the DynamoDB table, keyed by a partition key named [.code]LockID[.code], and you can inspect it directly:
Azure Blob Storage
Azure Blob Storage implements locking through native blob leases, with no extra backend configuration required. If a run is interrupted mid-apply, the lease can be left in place. The lock ID appears in the error message, but you can also inspect the lease state directly:
If [.code]force-unlock[.code] is not an option, for example the lock ID is unavailable, you can break the lease directly through the Azure CLI, which achieves the same result at the storage layer:
Google Cloud Storage
The GCS backend also locks natively with zero extra configuration. Terraform writes a lock object at [.code]/.tflock[.code] in the same bucket as your state, and the lock ID is the object's generation number, which is included in the error message. Deleting that object directly is the manual equivalent of [.code]force-unlock[.code] if the CLI command fails for some reason.
HCP Terraform and Terraform Enterprise
This is a common point of confusion: [.code]terraform force-unlock[.code] is a CLI command that works against backends where Terraform itself manages the lock file. HCP Terraform and Terraform Enterprise instead lock and unlock workspaces through their own UI and API, not the CLI command. In the workspace's Actions menu, you can select Lock workspace or Unlock workspace directly, or call the workspaces API endpoint to do the same thing from automation.
Consul
With the Consul backend, lock information lives in the Consul key-value store rather than in a file. You can list it with the [.code]consul kv get [.code] command, or query the same data through Consul's HTTP API.
Using terraform force-unlock: a worked example
- Identify the lock ID from the error message. For example: [.code]Lock Info: ID: b8814894-4a5f-217b-e97b-c4f5c02a1f88[.code].
- Confirm nobody else is running an operation against this state. Check your CI/CD dashboard, ask your team, or check the environment's deployment history if you are running on a platform that centralizes this, before assuming the lock is actually stale.
- Run the command with the ID from step one: [.code]terraform force-unlock b8814894-4a5f-217b-e97b-c4f5c02a1f88[.code]. Confirm the prompt with [.code]yes[.code], or add [.code]-force[.code] if you are running this non-interactively.
- Verify the fix by re-running the command that originally failed, such as [.code]terraform plan[.code]. If it proceeds past the locking step without error, the lock is cleared.
Unlocking remote state: alternatives to force-unlock
Wait instead of forcing: -lock-timeout
If two operations occasionally overlap for a few seconds, for example two CI jobs kicking off close together, [.code]force-unlock[.code] is the wrong tool. The [.code]-lock-timeout[.code] flag tells Terraform to wait for the lock to clear on its own instead of failing immediately:
This is worth setting as a default in CI pipelines that run plan, apply, or destroy operations back to back, so a brief overlap resolves itself instead of surfacing as a lock error at all.
Manual removal as a last resort
Occasionally [.code]force-unlock[.code] itself fails, usually because the backend is unreachable or credentials cannot reach the lock record. HashiCorp's guide to recovering state from backup covers this scenario directly. In that situation, the remaining options are backend-specific: delete the lock object from S3 or GCS, edit or remove the DynamoDB item, or break the Azure blob lease as shown above. All of these bypass Terraform entirely, so treat them with the same caution as [.code]force-unlock[.code] itself.
Coordinate before you unlock
Whichever method you use, confirm no other process is mid-write before you touch the lock, and consider pulling a backup first with [.code]terraform state pull[.code]. Never use [.code]-lock=false[.code] as a standing workaround for frequent lock errors. It disables the protection entirely rather than resolving whatever is causing the contention.
Troubleshooting force-unlock errors
The lock ID does not match
[.code]force-unlock[.code] will refuse an ID that does not match the current lock. This almost always means you are using a stale ID from an old error message. Re-run the failing command to get the current lock's ID and try again.
Permission errors during force-unlock
Clearing a lock requires write or delete access to wherever the lock record lives, for example [.code]s3:DeleteObject[.code] on the lock object, or the equivalent DynamoDB, GCS, or Azure permission. A permissions error here usually points to the credentials Terraform is running with, not the lock itself.
The same lock error comes back immediately
If you clear a lock and it reappears right away, something is still actively writing to that state. Stop and investigate before unlocking again. This pattern usually means step two of the worked example above was skipped.
Managing state locking at scale with env zero
Clearing a stuck lock by hand does not scale once a platform team is managing hundreds of environments across multiple backends. Ad Hoc Tasks in env zero let you run a command, including [.code]terraform force-unlock -force LOCK_ID[.code], directly on the environment's deployment container from the UI. That means resolving a stuck lock does not require local CLI access, a checked-out copy of the Terraform configuration, or direct credentials to the backend that holds the state.
By default, ad hoc tasks are restricted to organization administrators, since they allow arbitrary commands against a live deployment container. Teams that want to delegate lock-clearing to platform engineers without granting full admin access can do that with a custom role scoped to just that permission.
It is worth distinguishing this from Environment Locking in env zero, which is a separate, deliberate governance control rather than Terraform's automatic state lock. Locking an environment in env zero blocks deploys, destroys, plans, and drift detection outright, with a reason attached for anyone else who looks at it, and it stays in effect until someone with permission unlocks it. A Terraform state lock, by contrast, is transient by design and normally clears itself within seconds. If you are troubleshooting a “locked” environment in env zero and [.code]force-unlock[.code] does not seem relevant, this distinction is usually why.
Key takeaways
- [.code]terraform force-unlock LOCK_ID[.code] manually clears a stuck state lock. It does not touch your infrastructure, and on most backends it does not touch your state data either.
- Only use it when you are certain the process that created the lock is no longer running. Unlocking an active operation risks a corrupted state file.
- The lock ID is usually sitting right in the error message. You only need to hunt through backend-specific tooling when troubleshooting without that message in hand.
- S3 no longer needs DynamoDB for locking. [.code]use_lockfile = true[.code] has been the supported path since Terraform 1.11.
- [.code]-lock-timeout[.code] prevents most stuck-lock situations in CI before they happen, by waiting instead of failing immediately.
Frequently asked questions
Q. How do I fix a Terraform state lock?
Run [.code]terraform force-unlock LOCK_ID[.code], using the ID from the [.code]Error acquiring the state lock[.code] message. Only do this once you are certain no other operation is currently running against the same state.
Q. What is Terraform state locking for?
State locking prevents two operations from writing to the same state file at the same time, which is one of the most common causes of state corruption. Terraform acquires the lock automatically before any operation that could write state and releases it when the operation finishes.
Q. Can force-unlock corrupt my Terraform state?
[.code]force-unlock[.code] itself does not modify your infrastructure or your state data; it only removes the lock record. The risk is indirect: if you unlock a state that another process is actively writing to, that process and yours can both write at once, which can corrupt the state file.
Q. Does the S3 backend still need DynamoDB for state locking?
No. Since Terraform 1.11, the S3 backend supports native locking through [.code]use_lockfile = true[.code], using S3 conditional writes instead of a separate DynamoDB table. The older [.code]dynamodb_table[.code] argument still works but is deprecated.
Q. How do I avoid stuck state locks in the first place?
Avoid cancelling Terraform runs mid-operation, set [.code]-lock-timeout[.code] in CI so brief overlaps wait instead of failing, and use a platform that centralizes deployment history so you can quickly confirm whether a lock is stale before clearing it.
Terraform Force-Unlock: How to Safely Unlock a Locked State File
Hello, env zero fans! As some of you know, we have almost unlimited extensibility with 3rd party tools, using our custom workflows. You can hook in pretty much any tool, in any phase of the deployment. Today, we’re going to talk about how to prevent cloud misconfigurations before they start. We’re going to do this by chaining a tool in the deployment after the terraform plan phase. This is where our friends at Bridgecrew come in. Just like we at env zero have open-sourced the Terratag module of our platform, Bridgecrew has open-sourced Checkov!
Checkov
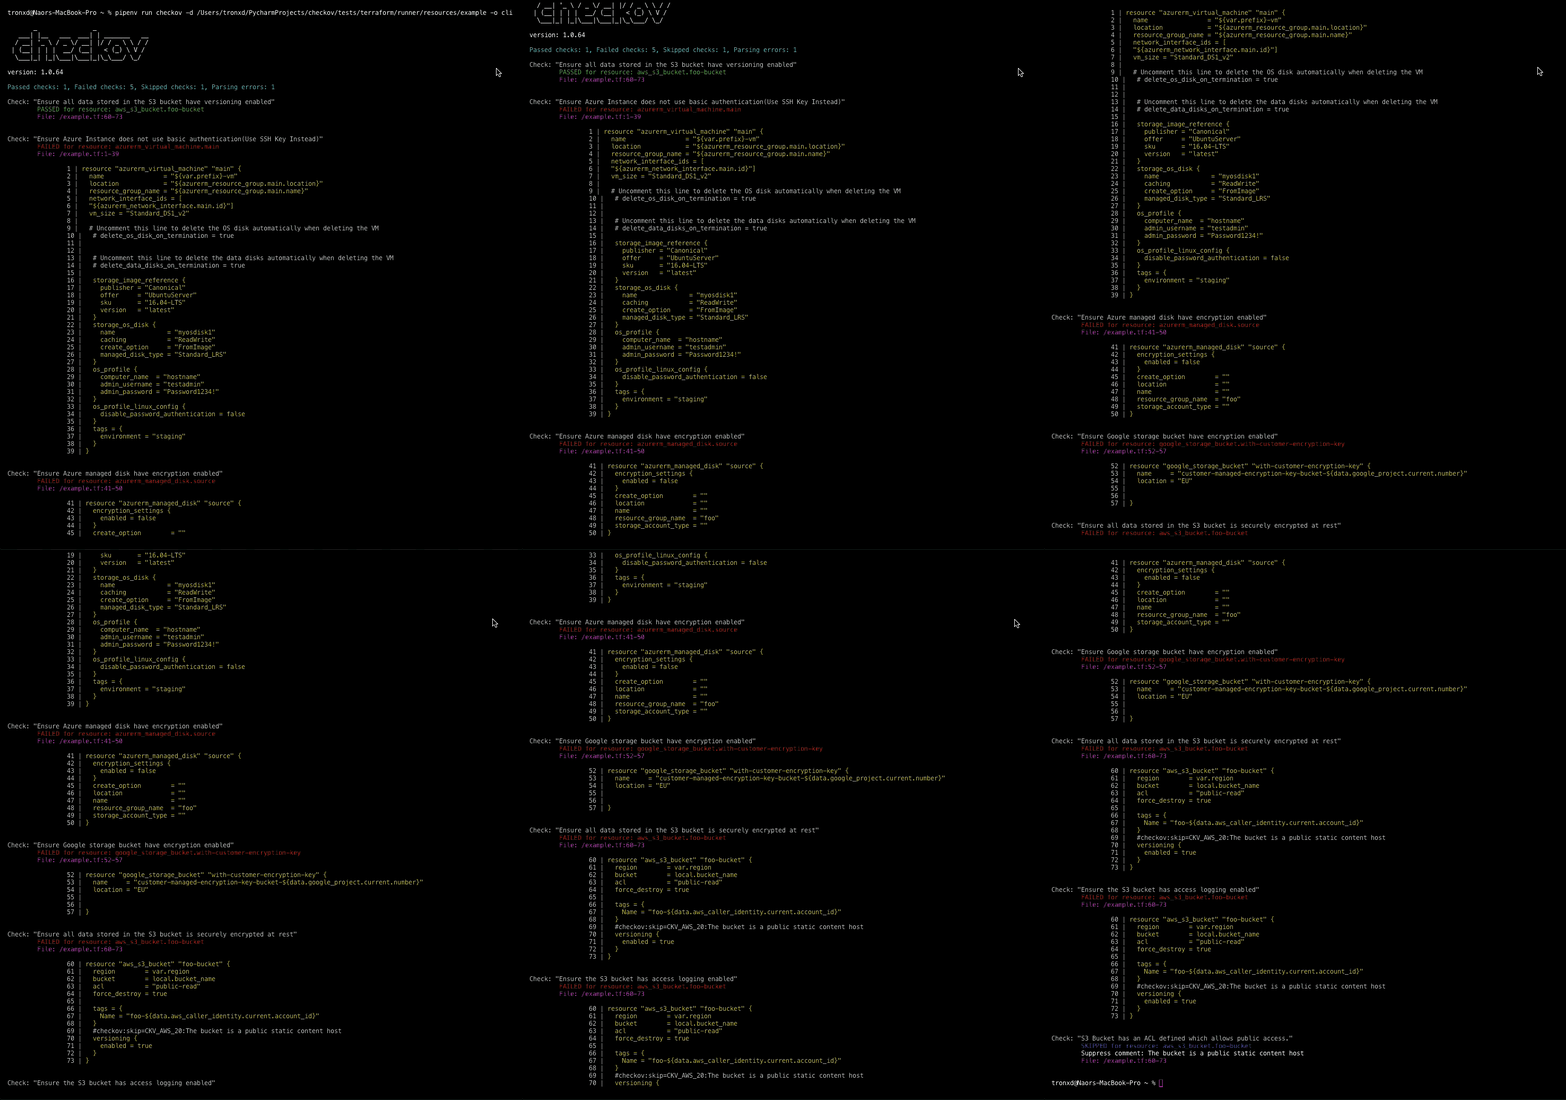
Checkov is a static code analysis tool for infrastructure-as-code. It scans cloud infrastructure managed in Terraform, Cloudformation, Kubernetes, Arm templates, or Serverless Framework and detects misconfigurations.
Setup
For illustration purposes, we’re going to use Bridgecrew’s demo application called TerraGoat. TerraGoat is Bridgecrew’s “Vulnerable by Design” Terraform repository. TerraGoat is a learning and training project that demonstrates how common configuration errors can find their way into production cloud environments.
DISCLAIMER: DO NOT ACTUALLY DEPLOY THIS APPLICATION INTO YOUR CLOUD INFRASTRUCTURE. IT IS PURPOSELY COMPROMISED.
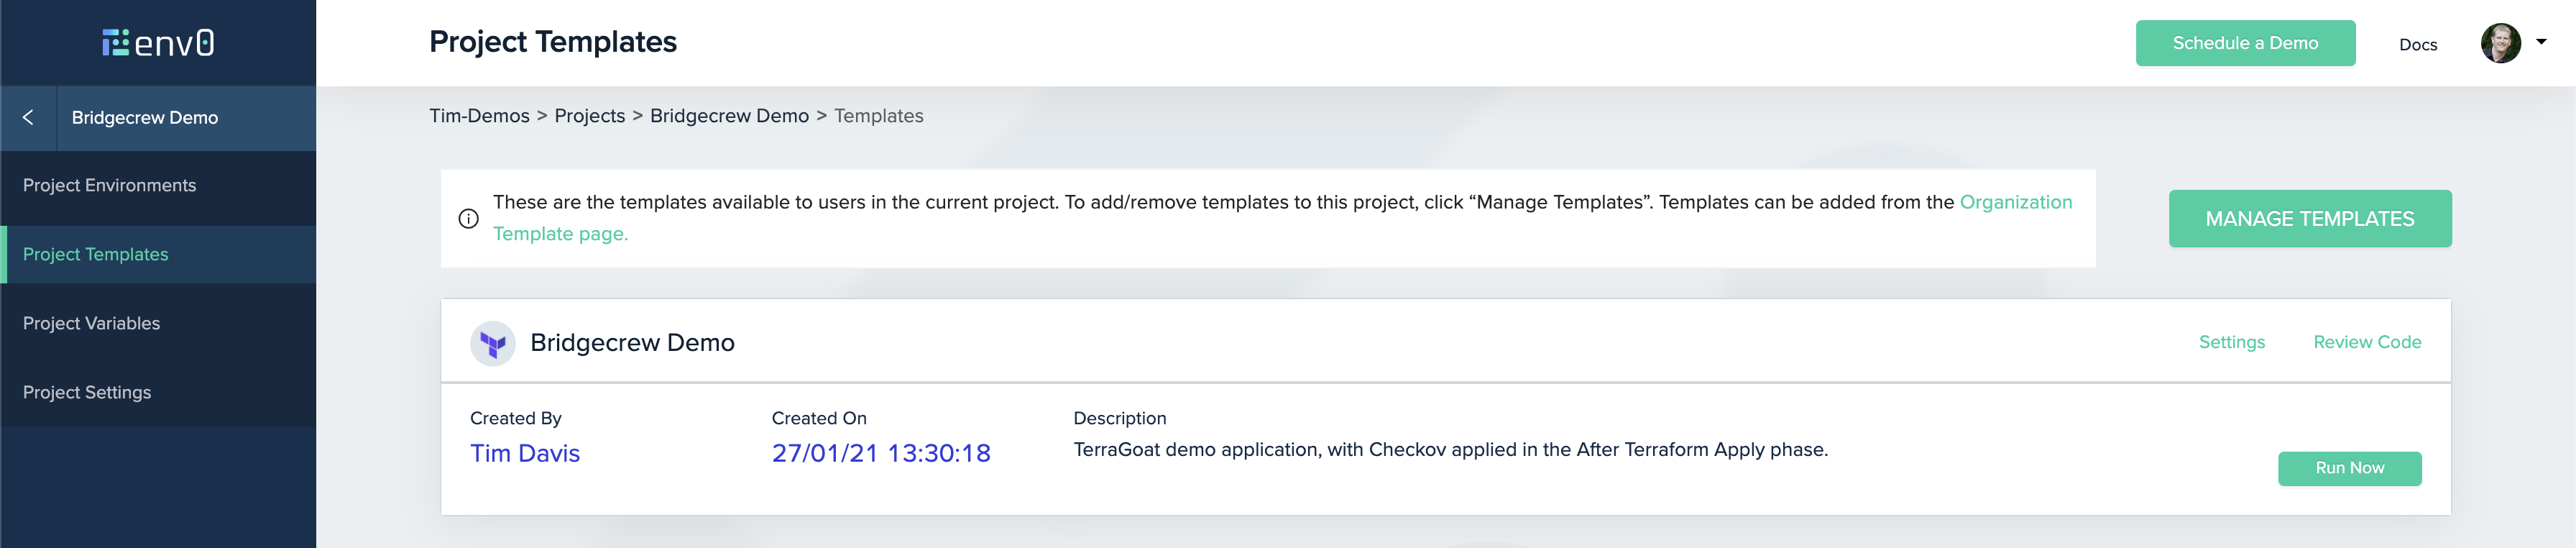
I have created a template of TerraGoat inside of env zero and linked it to our Bridgecrew Demo project.
The only other thing we have to do is to actually call Checkov to do the check during the deployment. We need to do this after the Terraform plan phase, so that we have a plan to check. Here is what the env0.yml file will look like:
This adds 3 commands that run after the Terraform Plan, and before Terraform Apply. We put it here so that the Apply doesn’t run in case of failures. We don’t want to see the errors after the resources are applied. We want the deployment to fail if there are errors.
This command installs Checkov into our runtime environment using the pip3 package installer so we can run it against our Terraform plan.
This command essentially formats our .tf-plan file into tf.json so that it can be parsed and run against Checkov.
This command has a lot going on and is in 2 parts. First, it quietly executes Checkov against our tf.json (the reformatted tf.plan file) and looks for a 0 exit code. The double pipe || tells bash to only execute the 2nd command if the exit code of the first command is not 0. So if your Checkov results are clear, your deployment gets the 0 exit code and continues on with the deployment.
If not, then the second part of the command runs. Knowing if this part runs, it is because of a failure, we’re just going to format our error message here. We run Checkov again so we can pipe the error with the echoed error notification text to the console. The 1>&2 routs stdout to stderror, and the exit 1 code tells env zero that the stage failed, and to end the deployment run.
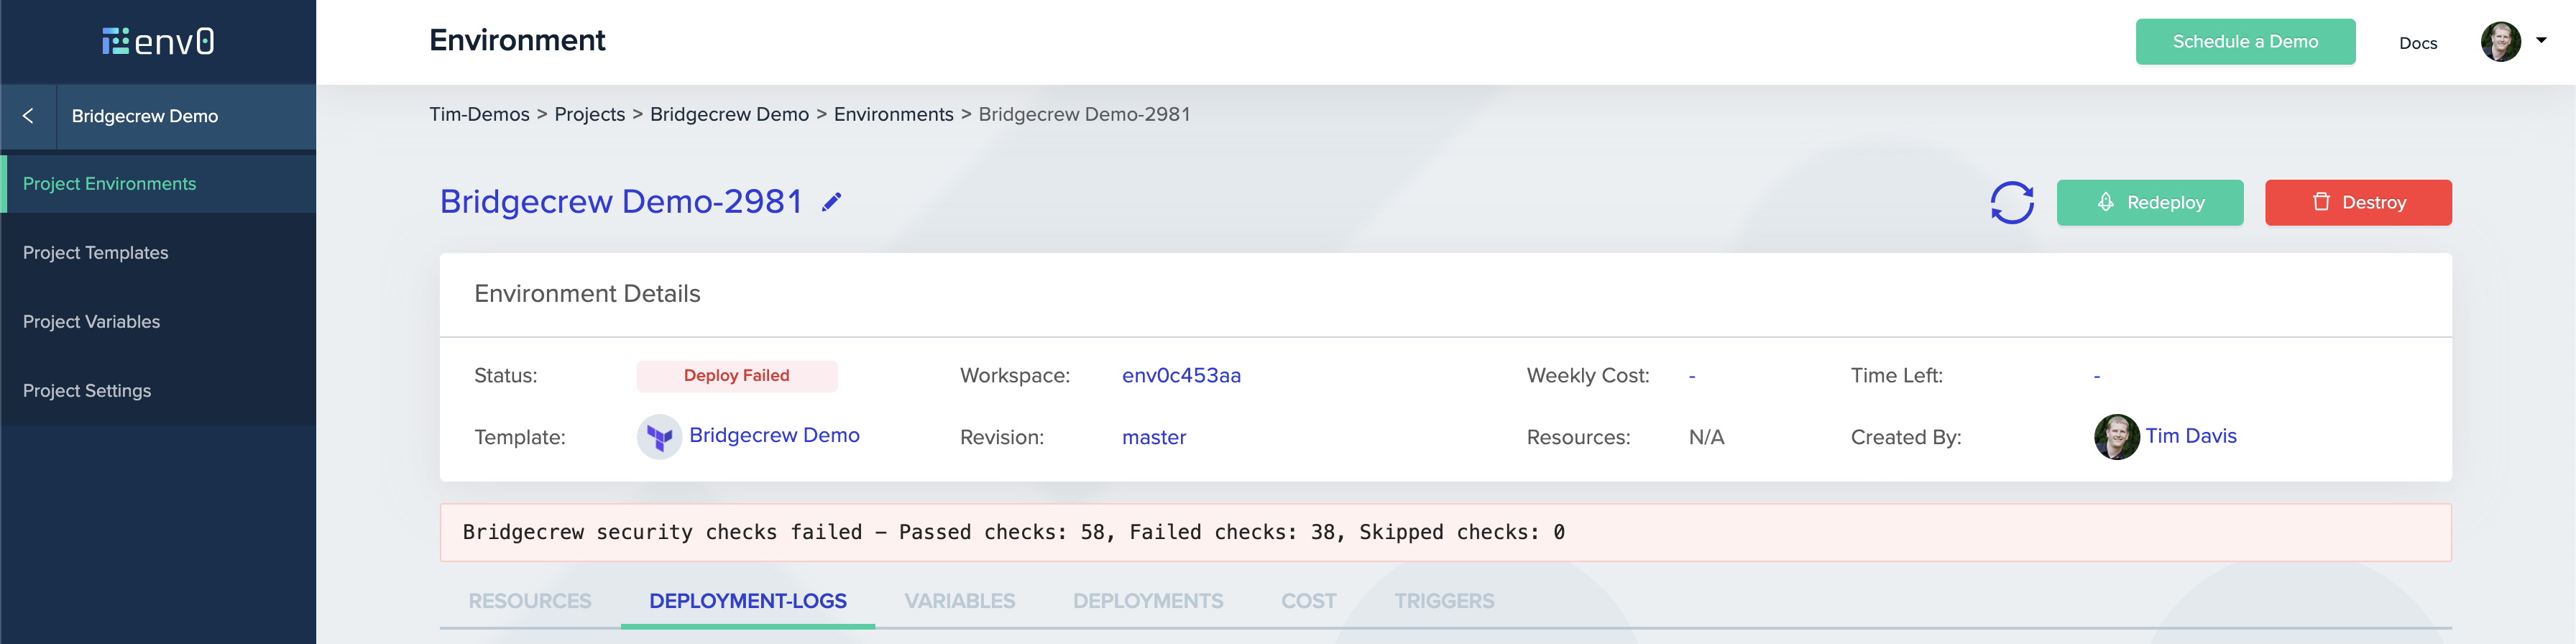
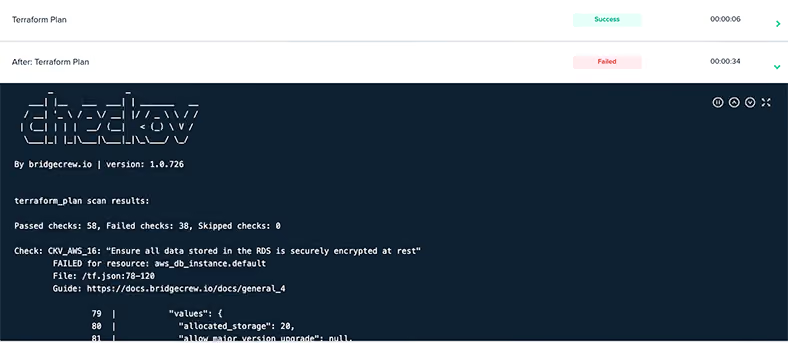
The env zero platform will parse the error, and give you the clear error printed on the Environment deployment page. But, if you want the full logs from Checkov, you can find those in the After: Terraform Plan deployment logs.
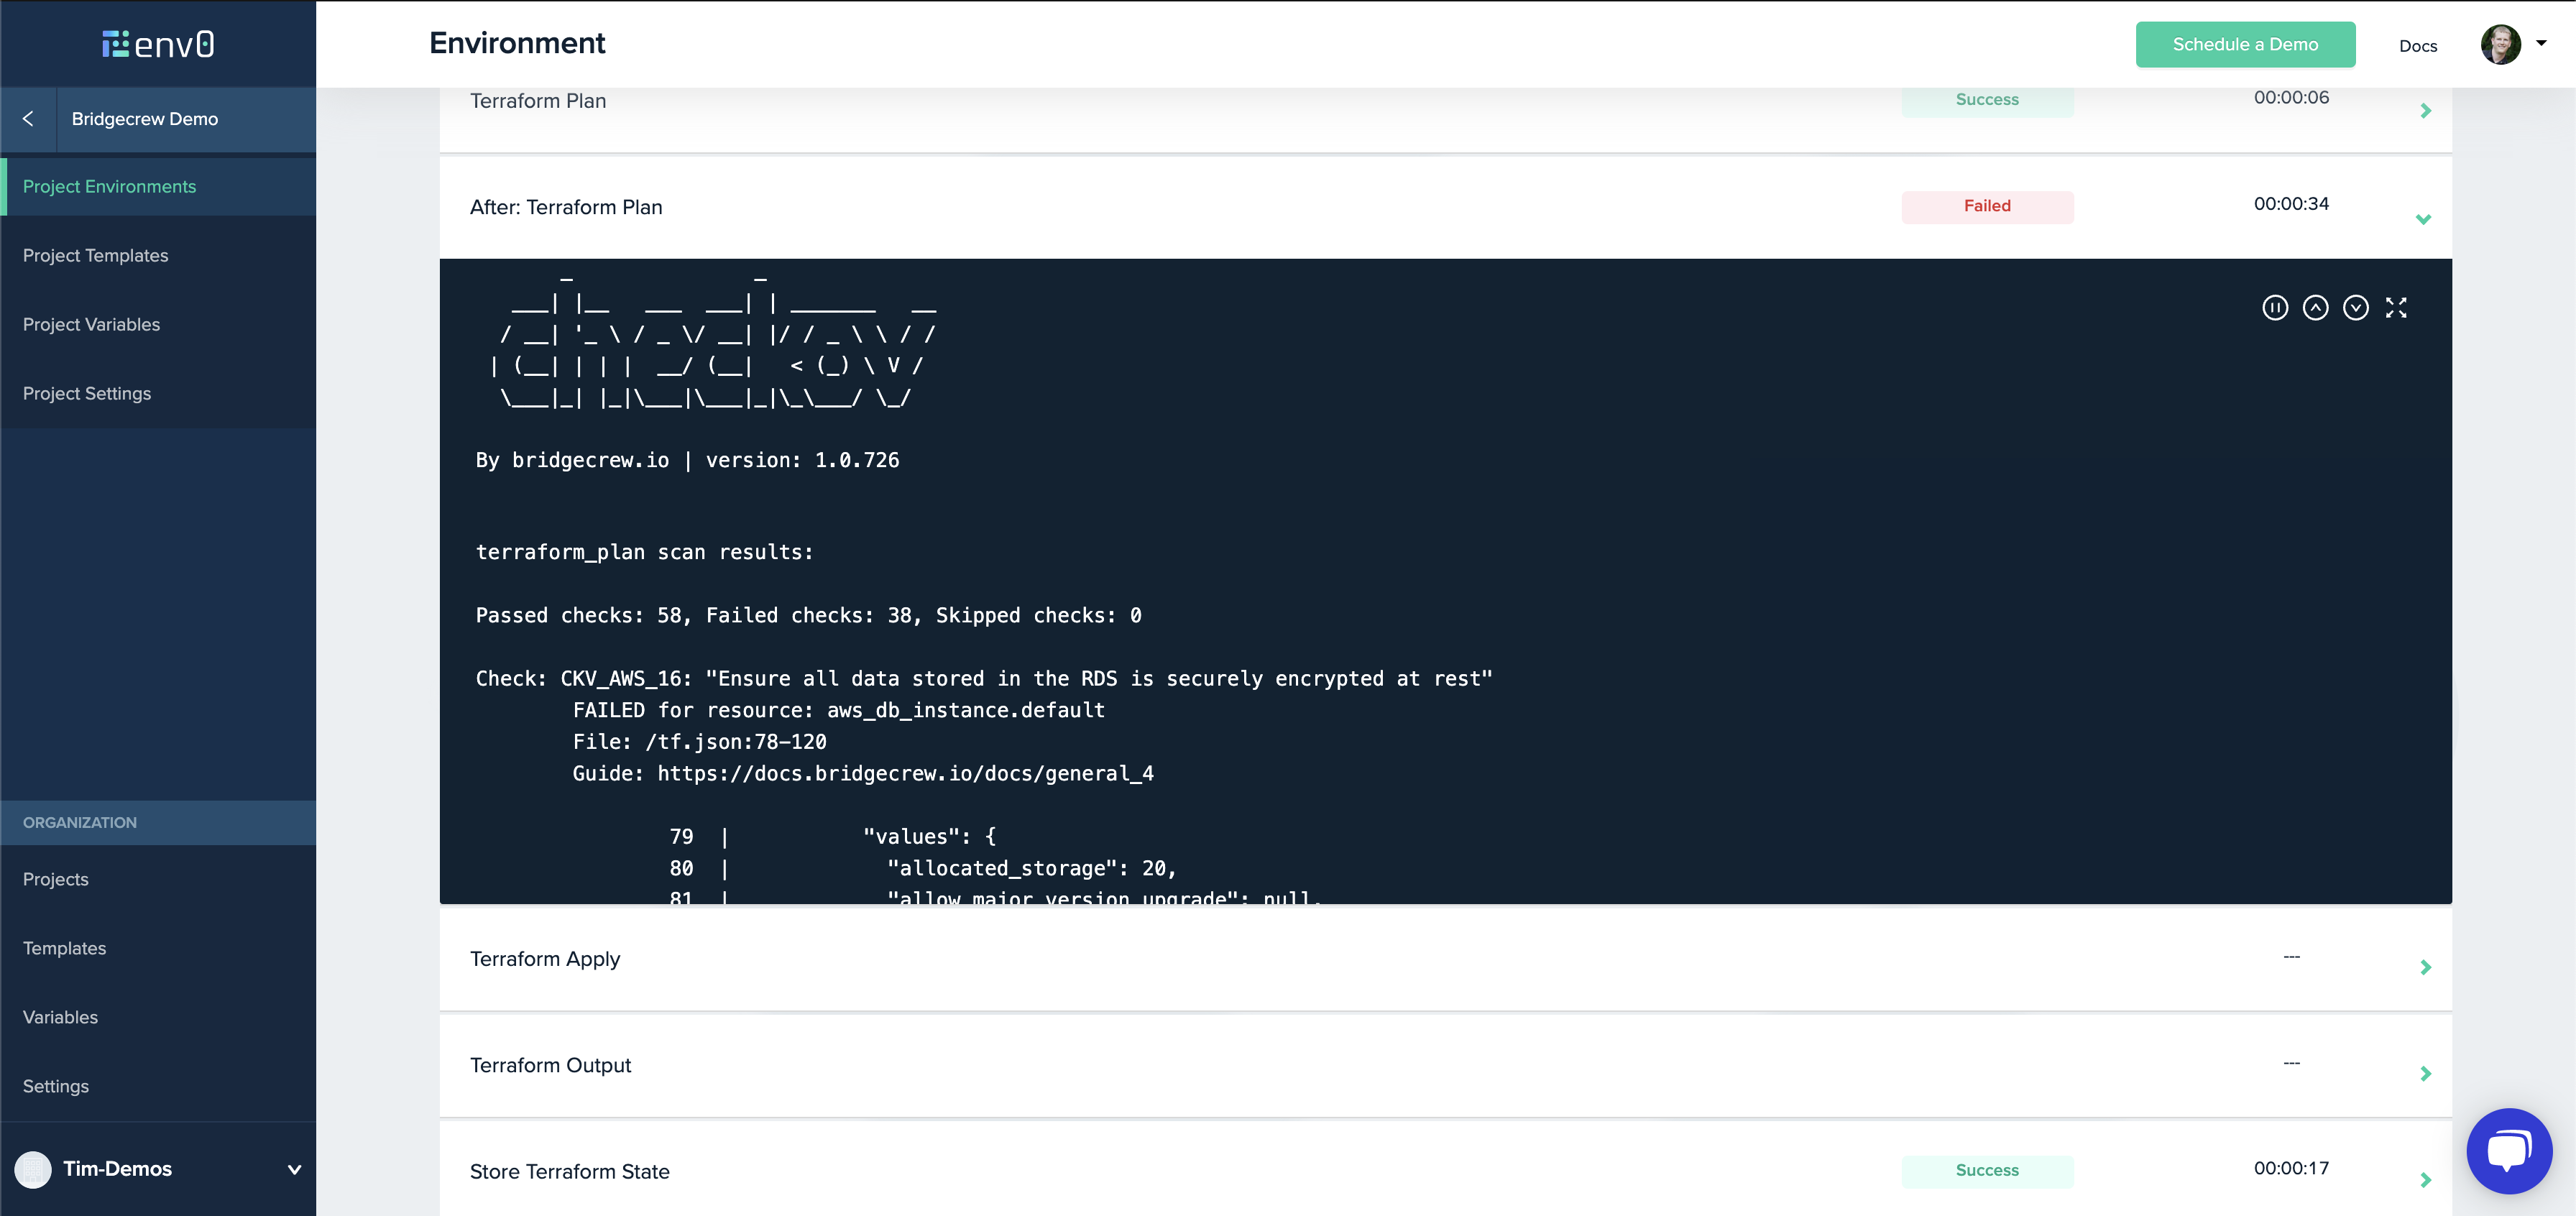
And that’s it! A little bit of YAML, and you’ve implemented Checkov to protect yourself against the deployment of misconfigured cloud resources. That is instantly added value to your organization by shifting the security left in your deployment process with env0.
You can find more information on Checkov here. You can find the open-source repository on GitHub. And be sure to see how you can automate your infrastructure security from commit to cloud at Bridgecrew.io.
Better Together: Checkov and env0


In a recent blog post, I discussed expanding the idea of “Feature branches” to “Feature environments”. Using Infrastructure-as-Code, we can create an environment for every feature we are working on, thereby giving us a more flexible, isolated development environment, and allowing us to test our code early in the development process.
In this post I’d like to continue down that path, and see how we can automatically create an environment for every pull request, and gain a number of advantages over traditional static staging or qa environments.
Pull Requests & Moving Beyond Static Staging
Pull requests are a well known and common workflow step for many development teams. We usually think of them as a way you “tell others about changes you've pushed”, and where you “can discuss and review the potential changes with collaborators and add follow-up commits before your changes are merged”.
PR’s are more than just a code review - they’re a milestone in a feature’s lifecycle and a way of saying “I’m ready for this to be shared”. Beyond sharing it for feedback with the wider team, this milestone is a critical time to ensure it functions exactly as expected as part of the whole application, including any potential infrastructure or configuration changes. However - just as we wouldn’t want our data migration to run on the shared database at this point, we also want to use dedicated test infrastructure.

Static VS Dynamic PR Environments
At this point, you might ask yourself - I’m already testing my code and infrastructure changes in our dev/qa/staging environment, why complicate things?
Well, there are a number of advantages to moving from traditional, static environments, to dynamic, per-pull-request environments:
- They’re Isolated and Dedicated - having a dedicated environment for each PR means no more confusion of which version or branch is currently in staging, and no coordinating between people who want to test different versions.
- Easier To Share - Because each PR has its own fully functional environment, non technical stakeholders can provide feedback on new features very early in the process. Developers can then iterate over this feedback - without interfering with work being done by other team members.
- No Wasted Resources - Because you’re only provisioning an environment when you actually need it for testing, you’re not wasting (or paying for) resources when you don’t actually need them.
- Removes Bottlenecks In The Release Cycle - Shared development and staging environments are notorious bottlenecks for development teams, especially when they are the first place where new code meets infrastructure. It’s not uncommon to see a queue of who is using the environment for testing their features. Your developers time shouldn’t be spent on waiting.
How Do You Actually Do It?
Ok, so “per pull request environments” is an awesome idea. How are we going to actually get there? There are a number of tools out there that can help you accomplish this task but in this post, I’ll be using env0, a first of it’s kind environment-as-a-service platform - not just to deploy the environments, but to manage them as well.
Your default assumption might be to just use your CI/CD platform to set up your environment. This works, but most CI/CD platforms are built for running short lived tasks, whereas an environment’s lifecycle extends beyond deploying it once: It needs to be updated, monitored, and in the end destroyed. Besides easily automating resource provisioning using Terraform, env zero will help me keep track of which environments are up, which ones have had issues, and will provide me a top level view of how my whole team is using these environments.
Besides env0, I’ll be using Github to host my code and open pull requests, and Github Actions to trigger my environment creation. I’ll be using the same code example from the previous post, which will be deployed on AWS.
If you’d like to try this out yourself, the prerequisites for this tutorial will be
- An env zero account (it’s free, just login)
- A Github account
- An AWS account

Getting Our Hands Dirty
Step one to fully automating anything is to make sure we can run it manually, so you’ll want to get your system set up. In my case, I’ve followed env0’s getting started guide, and taken the key steps of creating my own organization, connecting my AWS account, and creating a template for my Terraform code.
Custom workflows to the rescue
In the example code I’ve used, I also ran a bash script before deploying the environment. We can easily make sure this code runs before our Terraform is applied, using env0’s Custom Flows feature. I’ve already done this in advance and I’ve put my code in the env0.yml file, in our Github repo.
Let ‘er Rip!
We are ready to launch our first environment! Remember - this is just a manual test, to see things are ready for automation.
In the case of env0, just go to your Project Templates pages, and click “Run now” on the template we’ve created before. In the next screen, you can validate your settings, and when you’re ready - click “Run”.

Great!
Integrating into CI/CD
Now that we know our environment management system will properly configure our environments, we need to make it run each time we open a pull request. For that, we’ll be using Github Actions to trigger env0’s CLI.
In order to create an environment on env zero from Github Actions, we need to create an API key for env0.
Next, we’ll need to save the API key and secret as Github Secrets, in the same manner we saved our AWS credentials to env0.
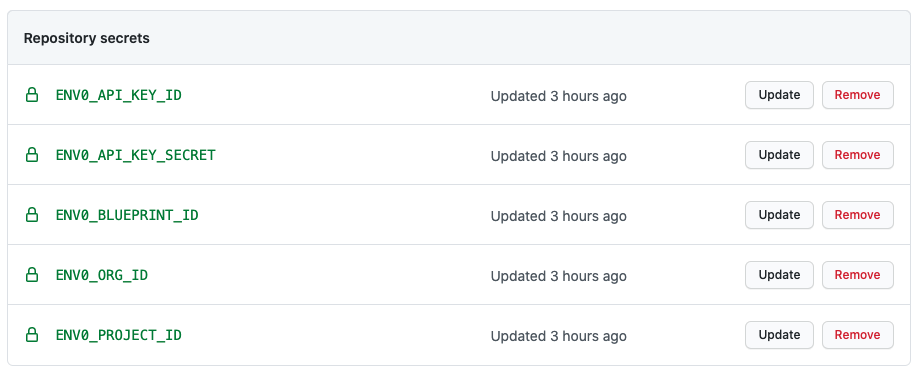
The final step of connecting everything, is telling Github how to trigger our environment deploy. We’ll add the following code to our codebase, in the file `.github/workflows/pr-environments.yml`.
In the code above, you can see we
- Determine the action depending on the Github event data
- Fetch the env zero CLI, using the `checkout` action
- Run the env zero cli to deploy, update, or destroy the environment
- The name of the environment will be the branch name
That’s all folks!
We now have a fully functioning pipeline, and our setup will automatically create a new environment for every PR we open! When we deploy a new feature, even if that feature requires new or different infrastructure, the changes in our Terraform code will automatically be reflected in the resources provisioned for the PR environment!

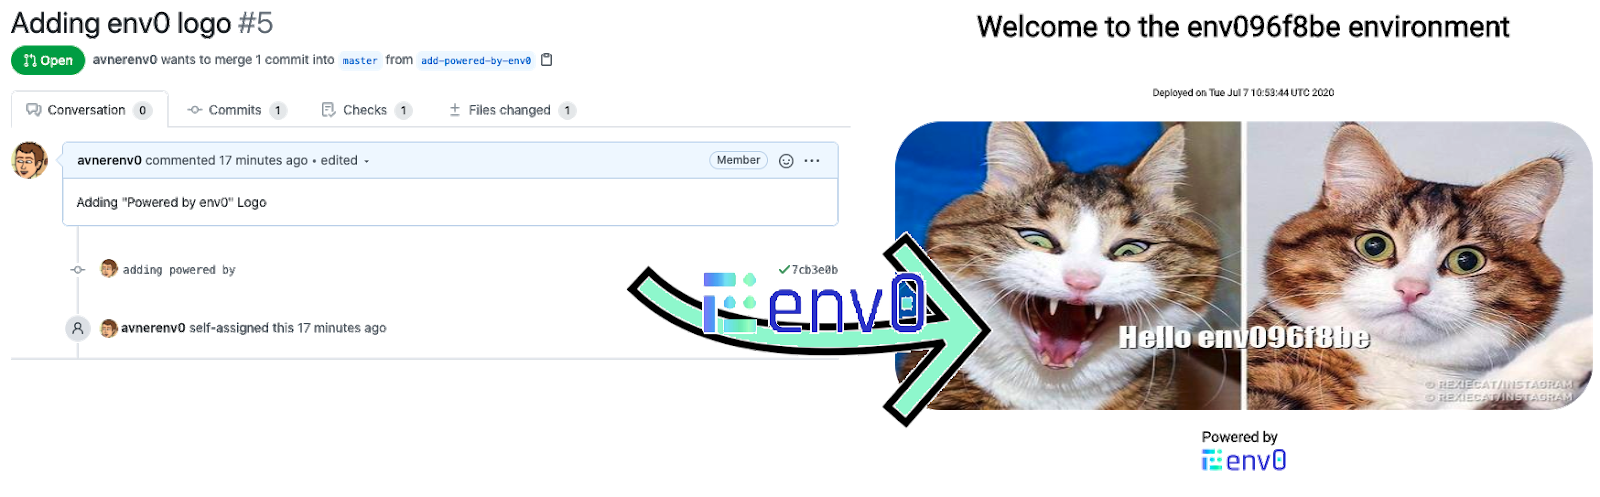
In the case of env0, even though environments will be automatically created and destroyed by our CI/CD integration, we can also use the env zero UI as a control plane, for understanding which environments are up, and what they consist of. You can also use env0’s cost monitoring features, to understand how much each of these environments actually costs.
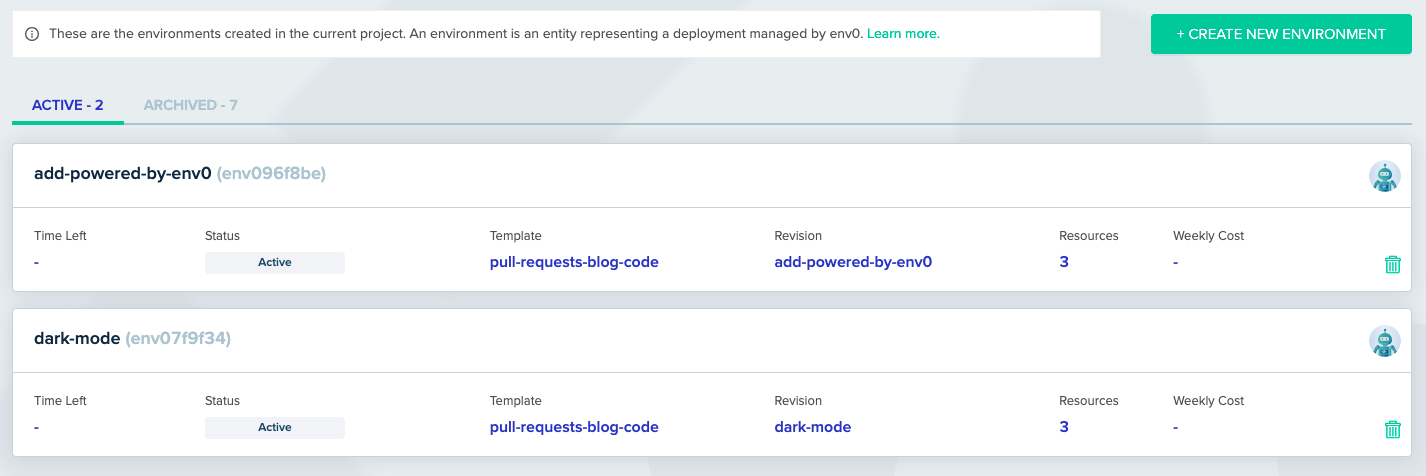
Thank you for taking the time to read this post, I hope it helps you setting an environment-per-PR pipeline for your team. Once you’ve tried it yourself, I’d love to hear about it! Let me know in the comments below or on Twitter at @envzero.
Why You Should Be Using Per-Pull Request Environments (and how!)